Today I finally got around to fitting my Nest 3rd gen thermostat, ran into a few issues with the wiring as I was under the assumption that it was clever enough to not need the wires to the common connections for the central heating and hot water if they were the same as the main live, which they were on my original Honeywell setup.
Turned out after wiring it all in that indeed, you do need to jumper connect from live to each of the commons, at least in my case. After figuring this out I think my system represents the Y plan setup in the diagrams.
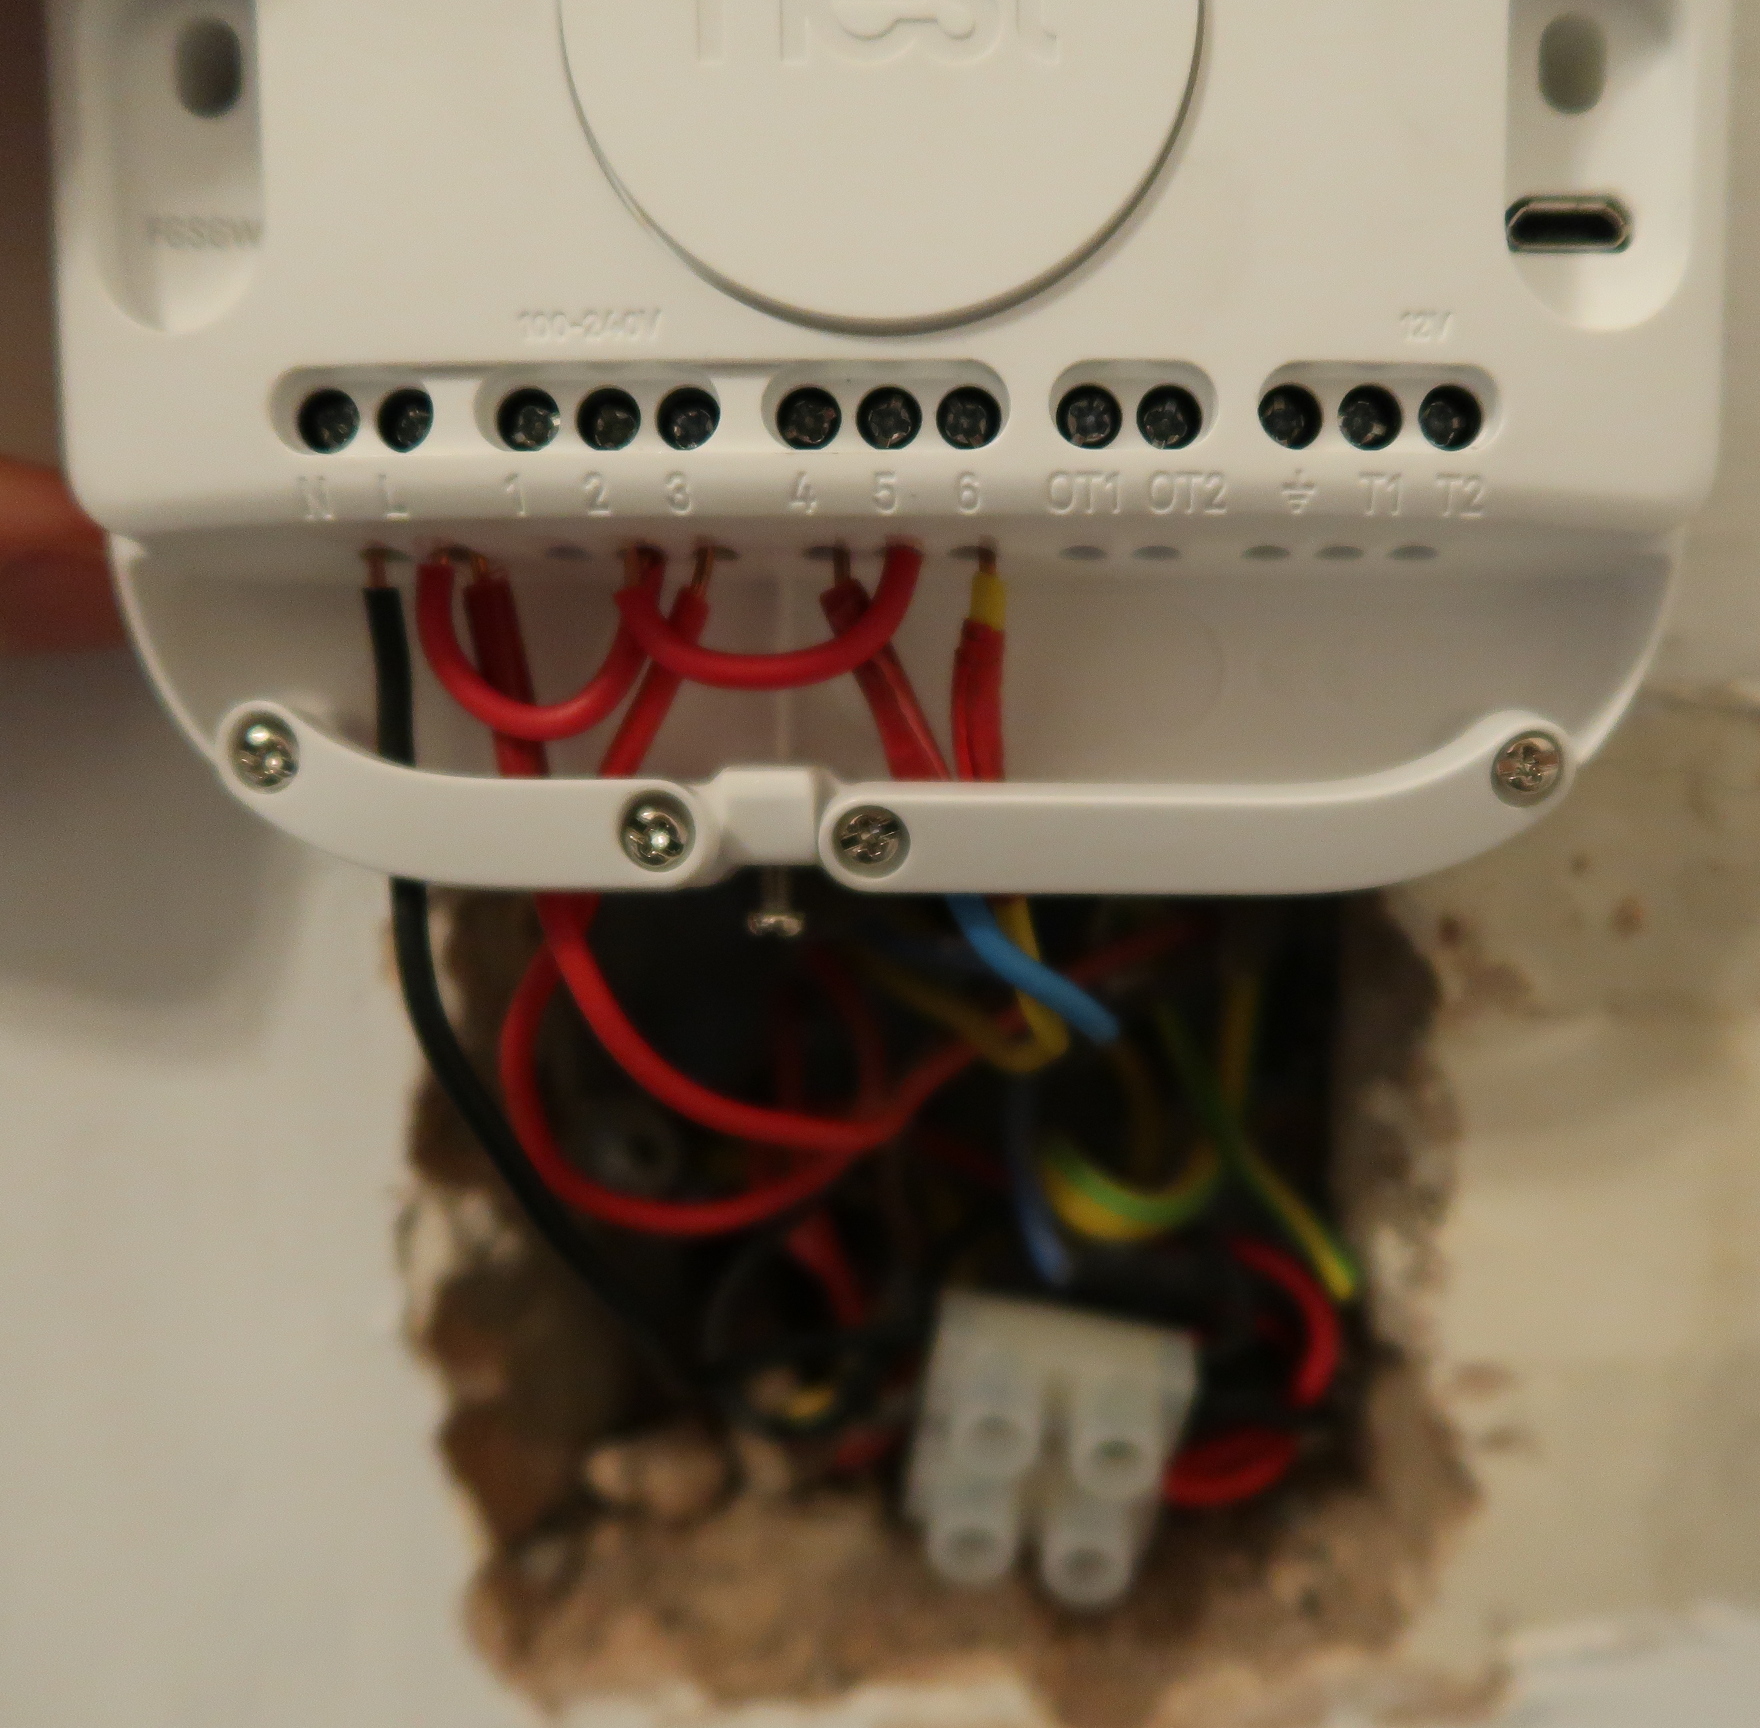
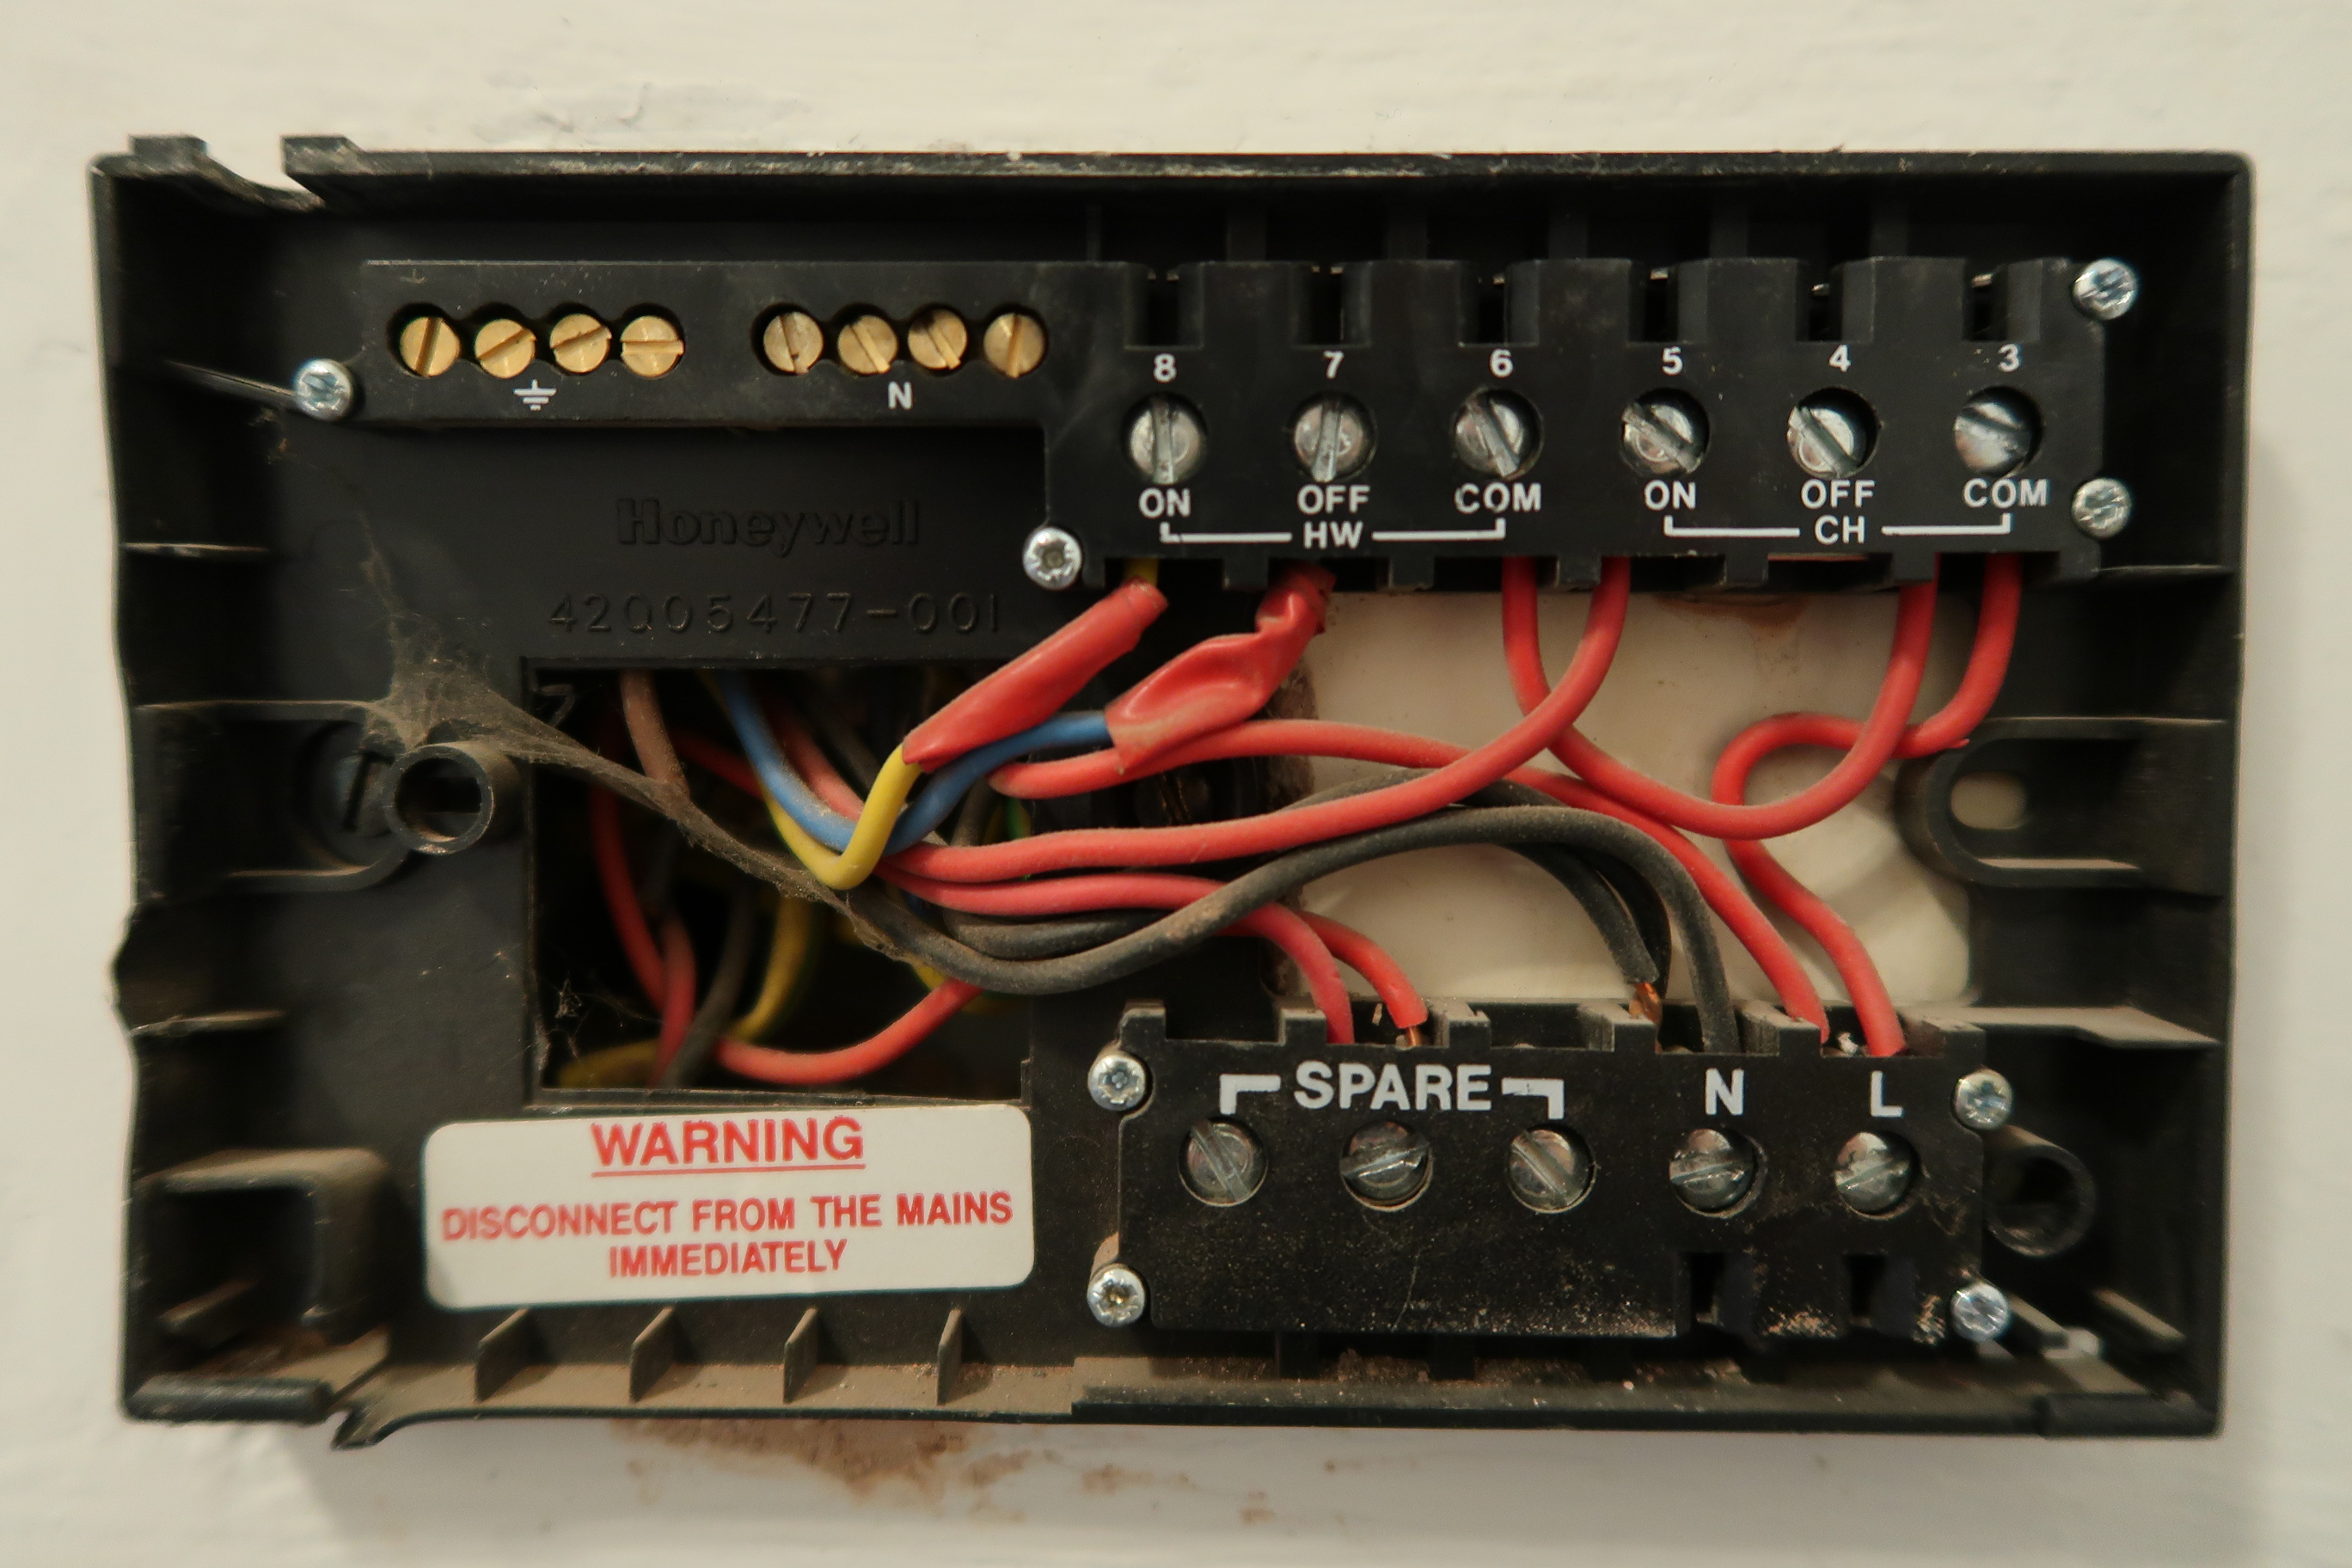
n case someone else plans to replace a Honeywell ST7100 with a Nest thermostat you need to wire it as follows:
- Any spare lives (I had two) into a connector strip and ignore
- Main live goes to L on the nest
- Neutral, I had three wires going into this so fed them into connector strip then a single wire from there to the N on the Nest
- 8 on ST7100 goes to 6 on the Nest
- 7 on ST7100 goes to 4 on the Nest
- 5 on ST7100 goes to 3 on the Nest
- Then the missing step I had, link L to 2 and 2 to 5
One thing I have discovered is that whilst the Honeywell seemed to give preference to hot water if both heating and hot water are requested, the Nest seems to give preference to heating. This lead to a lack of hot water on the first few days, but now I have just changed the schedule to be at times when the heating is not on.
Thanks for this, helped me. Don’t know if you had the same headaches with the thermostat as me as mine is mains voltage.
Hi Dale, I just left my old manual thermostat where it was and turned up to 30*C so it should always be on. I didn’t want to mess around with that as well 🙂